
Hello, this is the nat, Inc. Blog Editorial Team.
前回は「モデル撮影時のコツと注意点」についてご紹介しました。
モデル撮影については第2回「3Dモデルの作成方法」で書きましたが、
今回はさらにキレイなモデル撮影を行うために、
Scanatが苦手な撮影対象物について2回に分けてご紹介したいと思います。
Scanatが苦手な対象物としては下記のものがあげられます。
1.鏡・鏡面仕上げの対象物
鏡等はLiDARセンサーが反射してしまいデータが拡散するため、撮影が難しいです。
こちらの写真のように全くデータが撮れません。
また、鏡に写っている空間も認識してしまうため、余分な空間ができてしまうことがあります。
<鏡撮影時の画面>
<鏡を撮影した時のScanatのモデルデータ>
鏡は撮ることができないので、なるべく撮影しない形が望ましいです。
2.窓・ガラス
窓やガラス面は透明な部分をLiDARセンサーが透過するため、
ガラスがあることをモデルに反映させることができません。
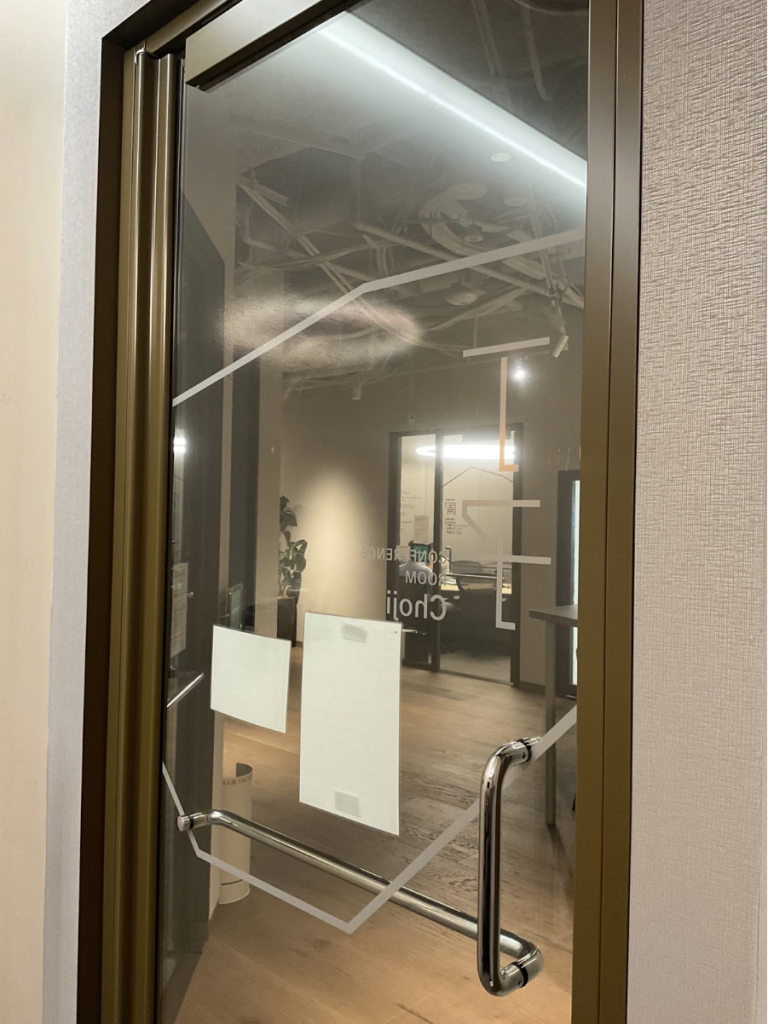
例えばこのようなガラスのドアがあった場合、撮影中は下記のように赤い点が消えません。

モデルを作って見ると下記の通り部屋の外のデータを取得しています。
窓枠等、ガラスの外周は撮影可能なので、赤い点が消えない状況でも焦らず撮影し続けることで、
その面の情報を正確に取得できます。
3.テレビのモニター等の黒く大きな対象物
黒色がLiDARセンサーを吸収するため、一般的に誤差が出やすいと言われています。
空間の中ではあまり気になりませんが、
モニターの端の方のデータが崩れやすいですがそのせいではないかと思っています。
<黒色を撮影したモデル>
4.暗すぎる場所
Scanatは3Dモデルを作成する際にLiDARセンサーからの取得データとカメラの写真のデータを組み合わせて使っている為、
撮影場所が暗すぎるとLiDARには影響は出ませんが、写真が暗くなった結果、モデルが黒一色になってしまい、
どんな対象物であったのかよくわからなくなってしまいます。
<暗いところのモデル>
しかし、明るさはLiDARセンサーのデータ取得には全く影響しないため、点群データの取得は問題なくできています。
そのため、メッシュデータを確認すると採寸等は問題なく可能です。
メッシュデータの確認はモデル情報画面の右下の「+」ボタンから、緑色の立方体のマクを選択します。
下記がメッシュデータです。真っ暗でよくわからなかった部分が測定できるようになります。
ただ測定するだけではなく、きれいな3Dモデルを作成したい場合には設置可能な照明を用意し、明るくして撮影してください。
たまに iPhone / iPad についているライトやヘルメットについているライトではいけませんか?というご質問を受けますが、
撮影者が動くたびに明るい箇所が変わってしまい、写真のデータが安定しないので、おすすめできません。
あと3つほど苦手な撮影対象物がありますので、次回ご紹介したいと思います。


