
Although many construction sites have adopted 3D scanning,
“We don’t know how to make use of the scanned models,”
we often hear comments like this.
In fact, Scanat users do more than just generate base drawings for drafting;
- Measuring Road Width
- Creating layout diagrams for scaffolding and temporary fencing
- Review of Pipe Routing
- Determining the quantity of required materials
- Calculating Roof Area
- Collecting materials
We Scanat all Scanat of our daily operations, such as...
In particular, President Yoshigaki of Yoshigaki Construction has established a system that allows the company to submit estimates Scanat.
A key feature of this system is its ability to share visual information with subcontractors and clients without having to visit the site, which significantly contributes to eliminating rework.
In this series, President Yoshigaki will provide a comprehensive breakdown of the “real-world application techniques” he actually uses on the job, through a combination of video series and articles.
Series 1 Theme: Effective Note-Taking Techniques — Making Information Sharing with Internal Teams and Partner Companies Smoother
In this post, we’ll introduce a highly effective way to useScanatnote-taking and photo features —one that anyone can start using right away.
◆ Take a photo of any areas of concern right then and there and add it to your notes
In addition to the photos automatically saved Scanat, you can take photos of areas of concern with your smartphone and add them directly to your notes. This allows you to organize repair points and areas requiring attention, ensuring that nothing is left out when sharing.
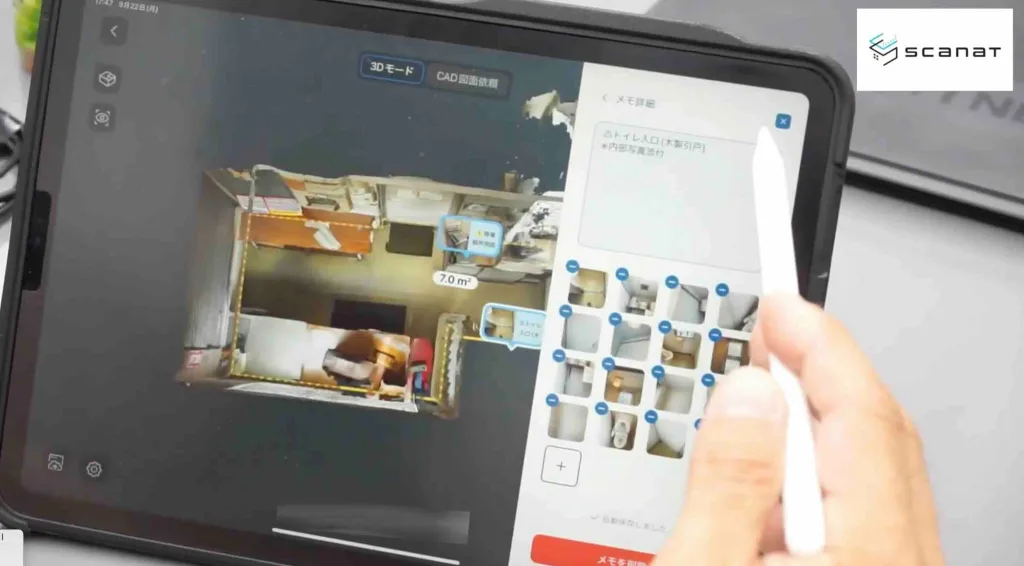
"If there's anything I'm curious about, I take extra photos and make a note of it so I can look back on it later."
Because it provides a clear visual overview, communication with internal teams and partner companies becomes smoother.
◆ Use emojis to make important points “easy to understand at a glance”
In his memo, President Yoshigaki used emojis (especially ) actively.
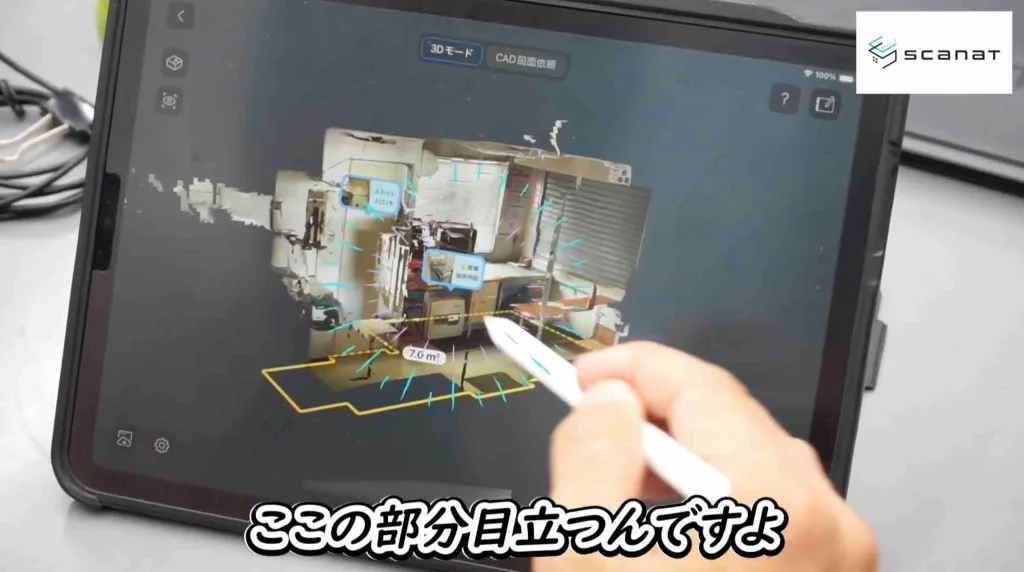
"The yellow warning sign is the first thing you notice when you look at the entire model."
A major advantage is its high visibility, which makes it stand out clearly even in 3D models and allows users to immediately grasp key points.
◆ For precise measurements in millimeters, use photos to supplement the information
For dimensions of fine details that cannot be captured by 3D scanning (e.g., a 10mm joint width), attach a photo taken with a convex lens to the memo to supplement the necessary information.
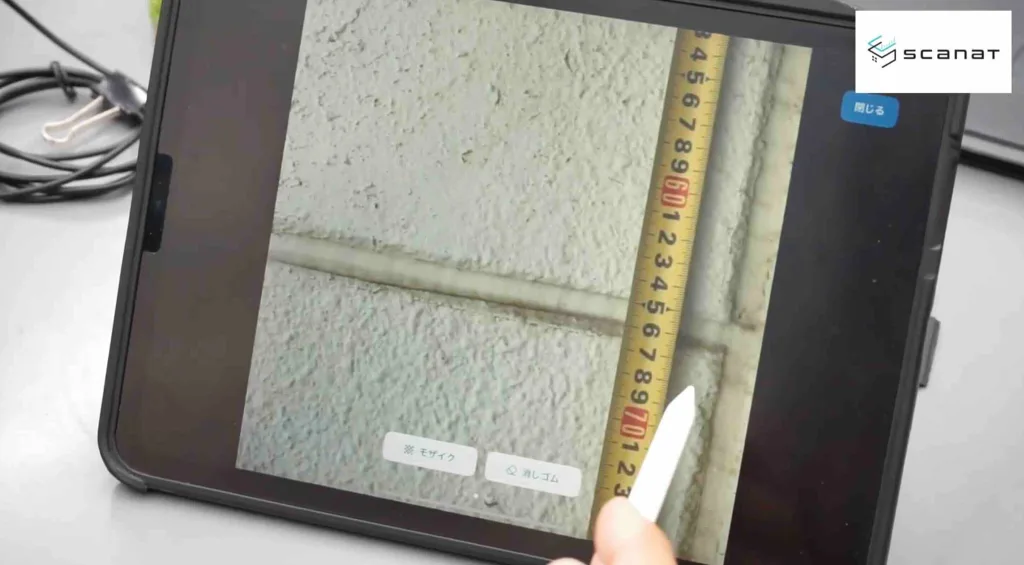
"It's difficult to measure Scanat, so I've included a photo for reference."
This combination of "scans and photos" ensures clear communication and enables the creation of highly accurate estimates.
◆ Calculate the required ladder height based on the ceiling height
By using the height data, you can instantly determine the required height of the stepladder.
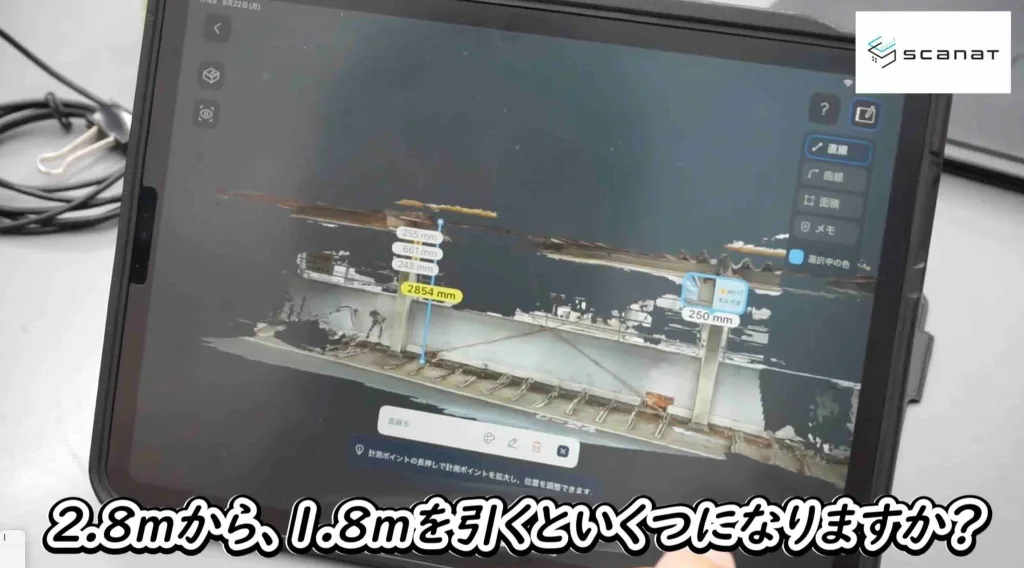
"If you subtract the 1.8 meters needed for the work from the 2.8-meter ceiling height, you can see that you can do the work using a 1-meter stepladder."
This is a practical technique that also helps improve the accuracy of on-site planning.
In Part 2, we’ll take a look at an actual bicycle parking facility renovation site…
- Layout of temporary fencing and portable toilets created using the Line tool
- Visualization of Water Pipe Routes and Calculation of Required Pipe Length
- Creating a system where everyone can view the same drawing through shared links
We’ll introduce practical ways to use this that are truly useful in the field.
▼Watch the first video here:
Tips for Using Notes: How to Streamline Information Sharing Within Your Company and with Partners
・How to Use Emojis to Share Important Points
・How to Record Joint Widths
・How to Calculate the Required Ladder Height
⬇︎You can watch the videos here
Introducing Scanat Application Case Study of Yoshigaki Construction Co.


