NEWS
March 31, 2026
[User Guide] Tips for Integrating Scanat with "Walk in home"

natAt [Company Name], we are conducting interoperability testing to ensure that data measured using the 3D scanning app “Scanat ” to ensure that data measured with it can be utilized more smoothly in practical work.

In this update, we’ll explain how to sync data with “Walk in home” and how to extract cross-sectional views (floor plans) from already-captured models.

◼︎Scanat DXF Export from the Web

"Scanat 3D data (in DXF file format) exported from “Web” can be imported into “Walk in home.”

Using the image below will significantly improve your efficiency in creating presentations.

◼︎Procedures for Use and Testing

ToScanat Web Users:

1. Log in to Scanat : Access the admin panel from your PC.

2. Downloading the DXF: Select "DXF" from the measured model to export it.

3. Launch "Walk in home" and load the file.

*If nothing appears when you load a file, try opening the file once in "Jw_cad" or "LibreCAD" and saving it; this will allow you to load the file in Walk in home.

♢For Customers Considering Our Services: Sample Data Available

If you are using "Walk in home" or other CAD software,Scanat we provide sample DXF files for testing purposes for those who wish to open DXF files created from models and evaluate their usability.

Please contact us via the inquiry form on this website, noting “Request for Walk in home integration sample” in your message.

♢Instructions (Web Version)

1. Navigating to the Drawing Page
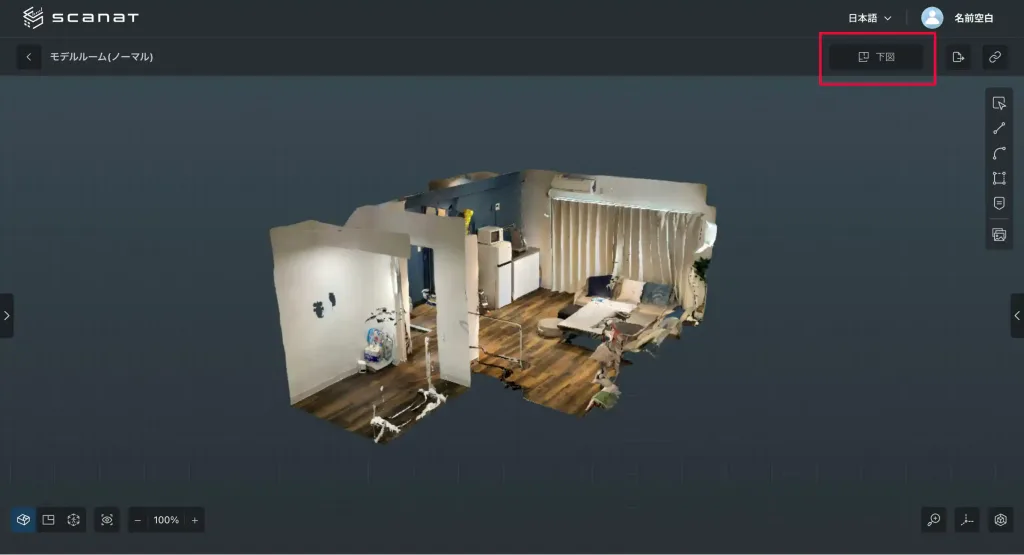
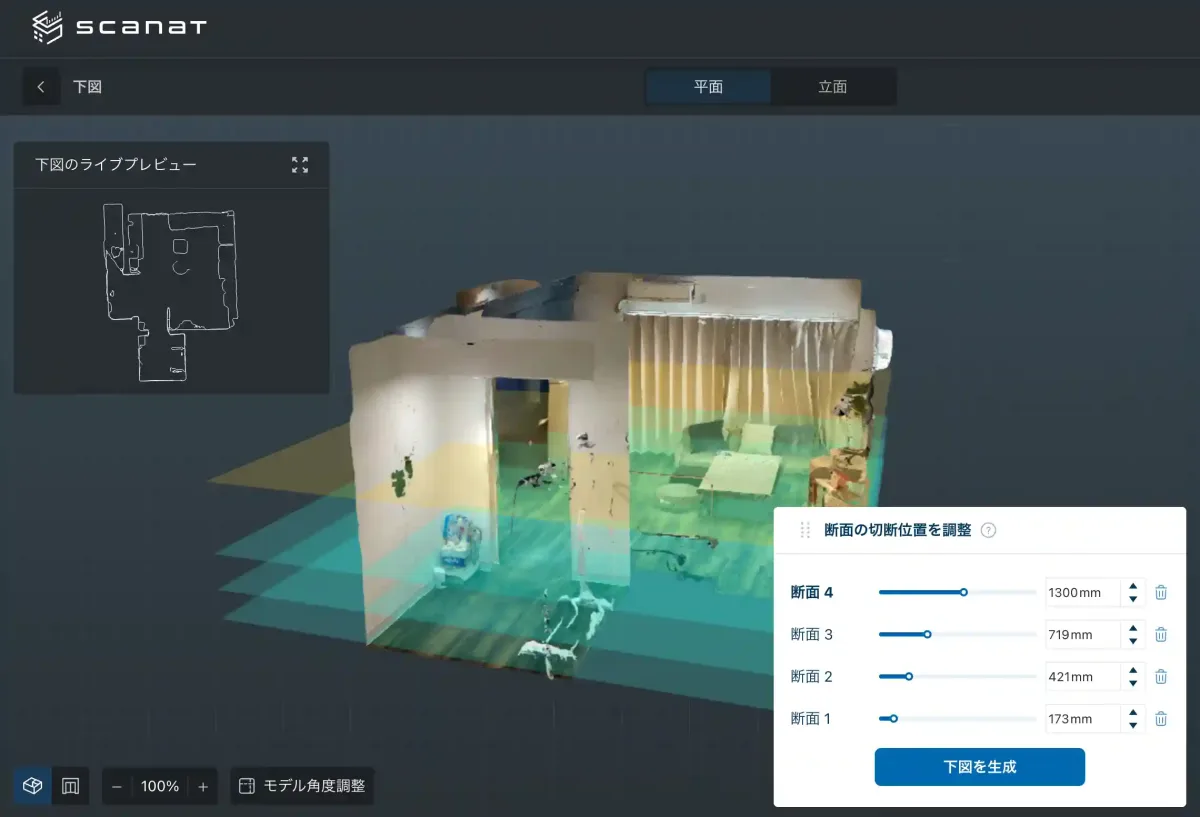
In 3D mode or Bird's-Eye View mode on the model details screen, click the "Drawing" button in the upper-right corner of the screen to go to the drawing page.

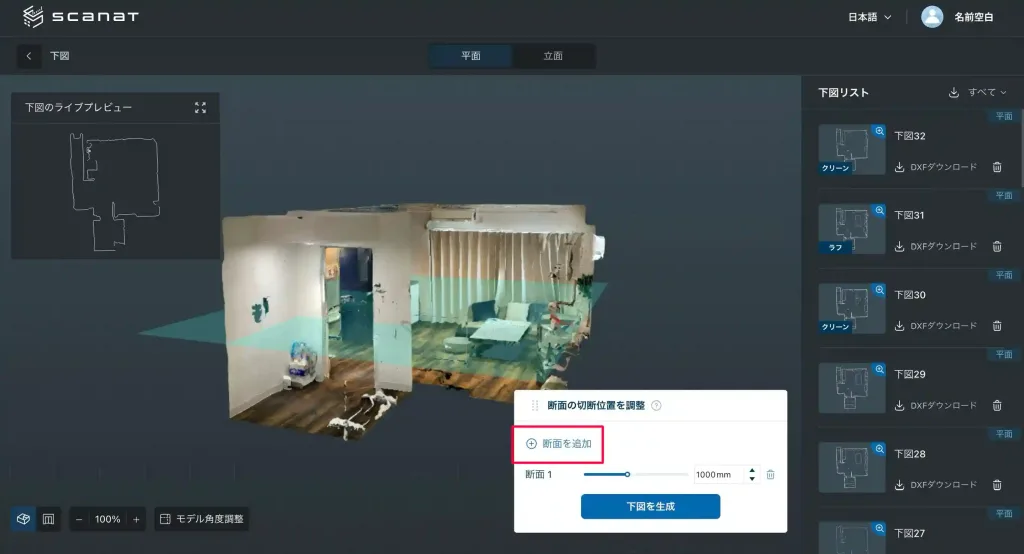
2. Adding a Cross-Section
Click the “Add Cross-Section” button on the control panel to add a new cross-section. You can then view that cross-section in both the control panel and the model.

*For each drawing shown below, you can add up to four cross-sections.

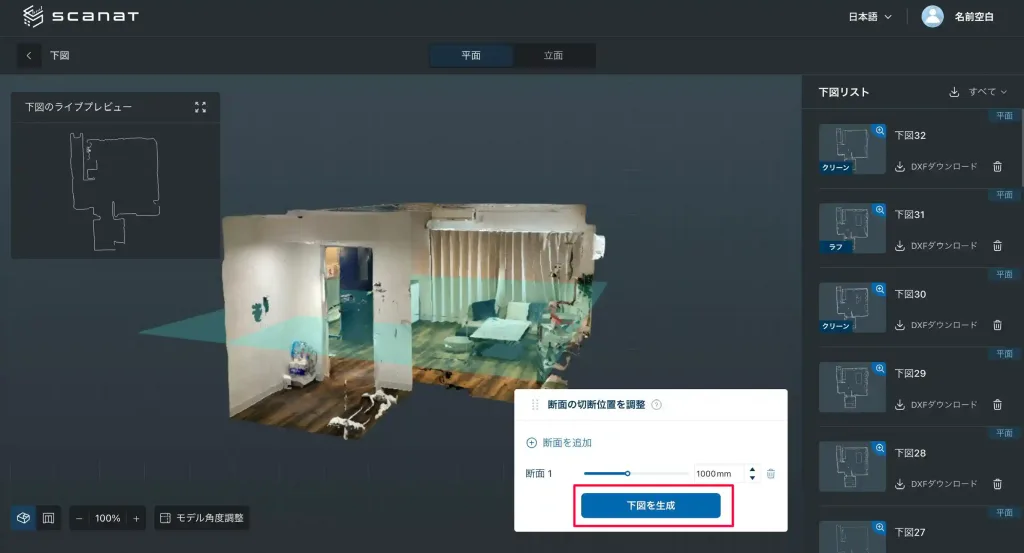
3. Generating the Figure Below
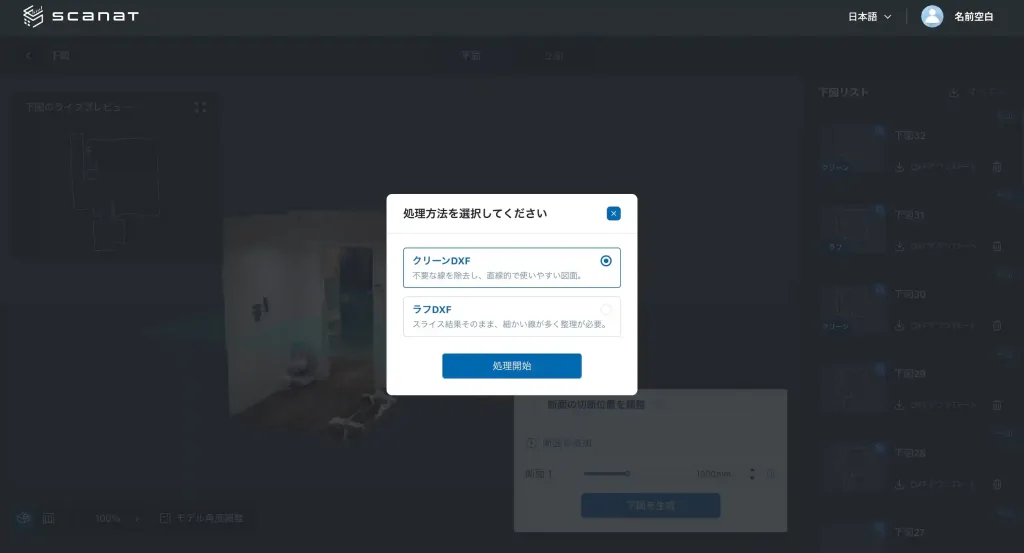
When you click the “Generate Figure Below” button in the “Adjust Cross-Section Cut Position” panel, a dialog box titled “Please Select a Processing Method” will appear.

4. Selecting a Processing Method
You can choose from the following two options depending on your needs.

・Clean DXF: A file in which point cloud data has been adjusted to be as straight as possible

・Rough DXF: A DXF file that directly reflects the slicing results

Select one of the options and click the "Start Processing" button to generate the image shown below based on your selection.

◼︎Scanat Original Web Model

ScanatYou can see what kind of data is available right here in your browser.

© 2022 - 2026 nat Inc. All rights reserved.